
Rawshuck
A tiny app for culling RAW+JPEG photo shoots — and the strange case of the resurrected RAW files
Published:
The Rawshuck web app lives at rawshuck.pages.dev. Skip the backstory and jump to usage instructions here.
A couple of years ago, at a less-fun-but-more-financially-stable time of my life, I decided to re-indulge in photography, an on-again off-again hobby of mine since childhood. I kitted up with a Canon R10 and nice zoom lens, both of which have been completely delightful and so much fun to use. Since then, I’ve been snapping away pretty voraciously — mostly birds/wildlife (as the zoom lens would suggest), lots of travel shots, and one sneaky wedding shoot. I’m by no means a pro, it’s just a fun hobby, but I really enjoy it.

An (admittedly niche) predicament
Like many a photography amateur, I’m very good at smashing the shutter button. I’ve given far less attention to the post-processing side of things.
I shoot in RAW+JPEG mode, which saves every photo twice: a JPEG (somewhere around ~10MB) and a .CR3 RAW file (~25MB of unprocessed sensor data). The JPEGs look perfectly lovely and are fine for 99% of purposes, but it’s a lossy compression format. If you want to edit the picture, the quality degrades further. RAWs, on the other hand, look like trash out of the box (people tend not to realise how much processing happens between the image sensor in their phone/camera and the jpeg they view on their screen), you must process the RAWs yourself to get a reasonably nice, useable image (which is effort). But the advantage is that, by doing the post-processing yourself, you retain full creative control (rather than relying on any in-built phone/camera/software processing process), and you can do so without losing any image quality.
By shooting in the combined RAW+JPEG format, the theory is that I’ll have perfectly serviceable JPEGs for the vast majority of my photos, which realistically I’ll never have the time, skill or energy to process myself. But I’ll retain the RAWs as insurance for my best shots, so the option is always there to do some serious post-processing in future. In practice, I’ve been accumulating masses of RAW+JPEGs, watching my disk space float away in the breeze, on the off-chance that one day I’ll lovingly touch-up by hand the 1-in-100 shot I might actually want to print and share.
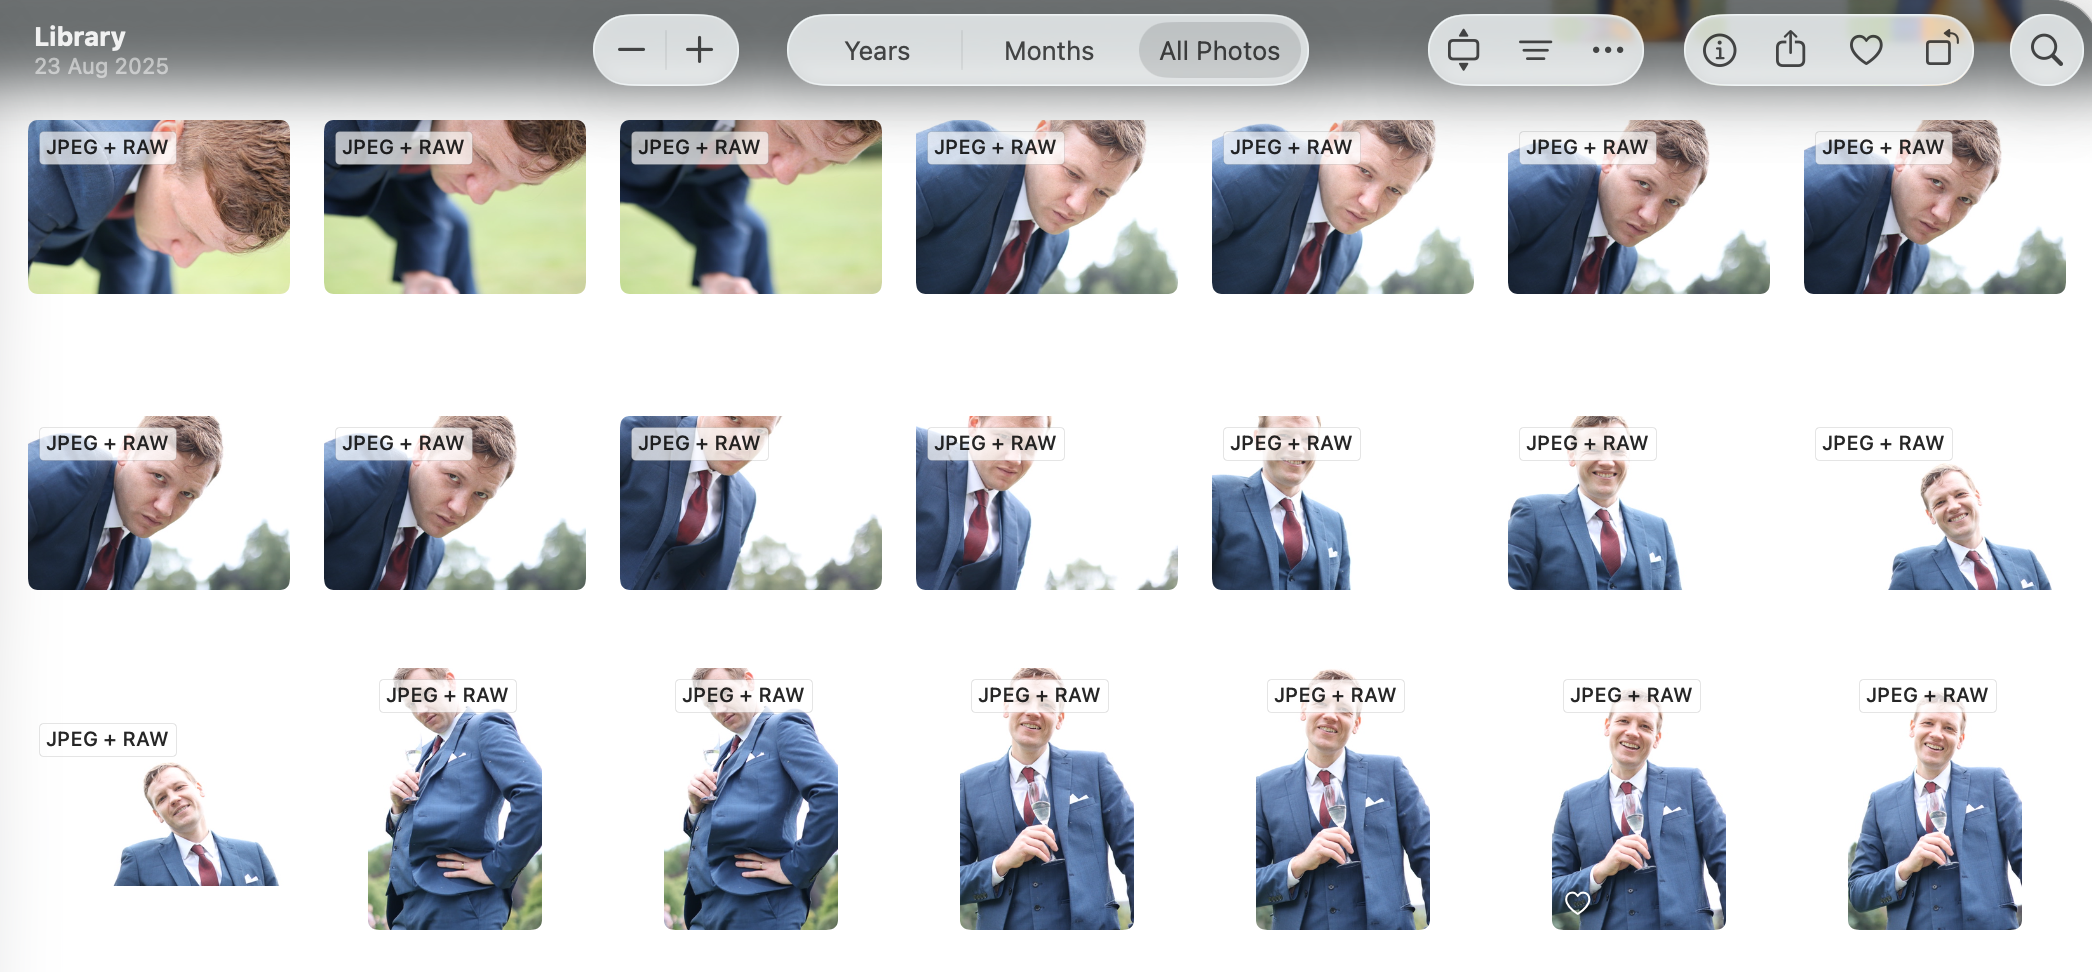
The obvious fix would be to keep RAWs only for the rare gems, while shucking the raws and keeping the perfectly serviceable JPEGs for the majority of pictures. You’d think this would be a simple task — right click > ‘delete RAW only’, something like that? Maybe it is in other software… I know Lightroom can separate JPEG and RAW components (although not without creating duplicate thumbnails, which would be annoying I think), and probably Canon’s proprietary software can too. But I don’t want to pay for Adobe, and it’s effort to shift away from Mac Photos, which I’ve been using for years and also syncs nicely between my devices.
But Apple wasn’t going to make things easy. And so here is where we hit the two walls that prompted this whole project.
Wall one: Apple Photos treats a RAW+JPEG pair as a single, indivisible asset. You cannot delete the RAW half and keep the JPEG. Not on the Mac, not on the iPhone. Ce n’est pas possible. It’s either keep both or delete. This isn’t an obscure gap, either — people have been asking for it for years, and the answer remains a mere shrug.
So what to do? If you’re importing new photos, you need to delete the unwanted RAWs from the memory card prior to first import, which is certainly possible but a bit clunky with Quick View in Finder, and not something I’ve been smart enough to do up to this point at any rate.
If the RAW+JPEGs are already in your library (as they are in mine), and you’re looking to shuck the unwanted RAWs, then there’s one established workaround:
- Export the RAW+JPEG photos (as unmodified originals) to some temporary folder. The export process will export two files per picture, the RAW and the JPEG separately.
- Delete the RAWs you don’t want (same clunky process in Finder).
- Delete the originals from the Photos app.
- Reimport them again from your tidied, temporary folder with the RAWs gone.
Pretty painful when you’ve got two years of back catalogue to get through… And even then, this leads to Wall Two, which I’ll come back to later.
What I actually wanted was simple. After each shoot, every photo faces one of three fates: (i) it’s a great photo (keep JPEG and RAW), (ii) a fine photo (keep the JPEG, shuck the RAW), or (iii) a dud photo (blurry, dark, six near-identical frames of the same bird — delete entirely). I wanted to be able to fly through a folder of photos assigning fates as fast and un-tediously as I could, then batch delete all the unwanted RAWs in one go, before anything gets imported into Photos and fused into un-splittable pairs.
No existing tool did quite this. There are plenty of existing photo culling apps, but either they’re oriented towards binary keep/reject workflows (rather than the three ‘keep both/keep JPEG/delete’ options I wanted to work with), or they’re commercial, or they’re bloated with other functionality and just too effortful to bother using, or all of the above. So I built a deliberately niche, lightweight programme that does exactly what I want and nothing else.
If you too happen to have a large collection of JPEG+RAW pairs that you want to sort, or just generally you need to cull a large collection of images quickly, maybe this programme can help.
Rawshuck
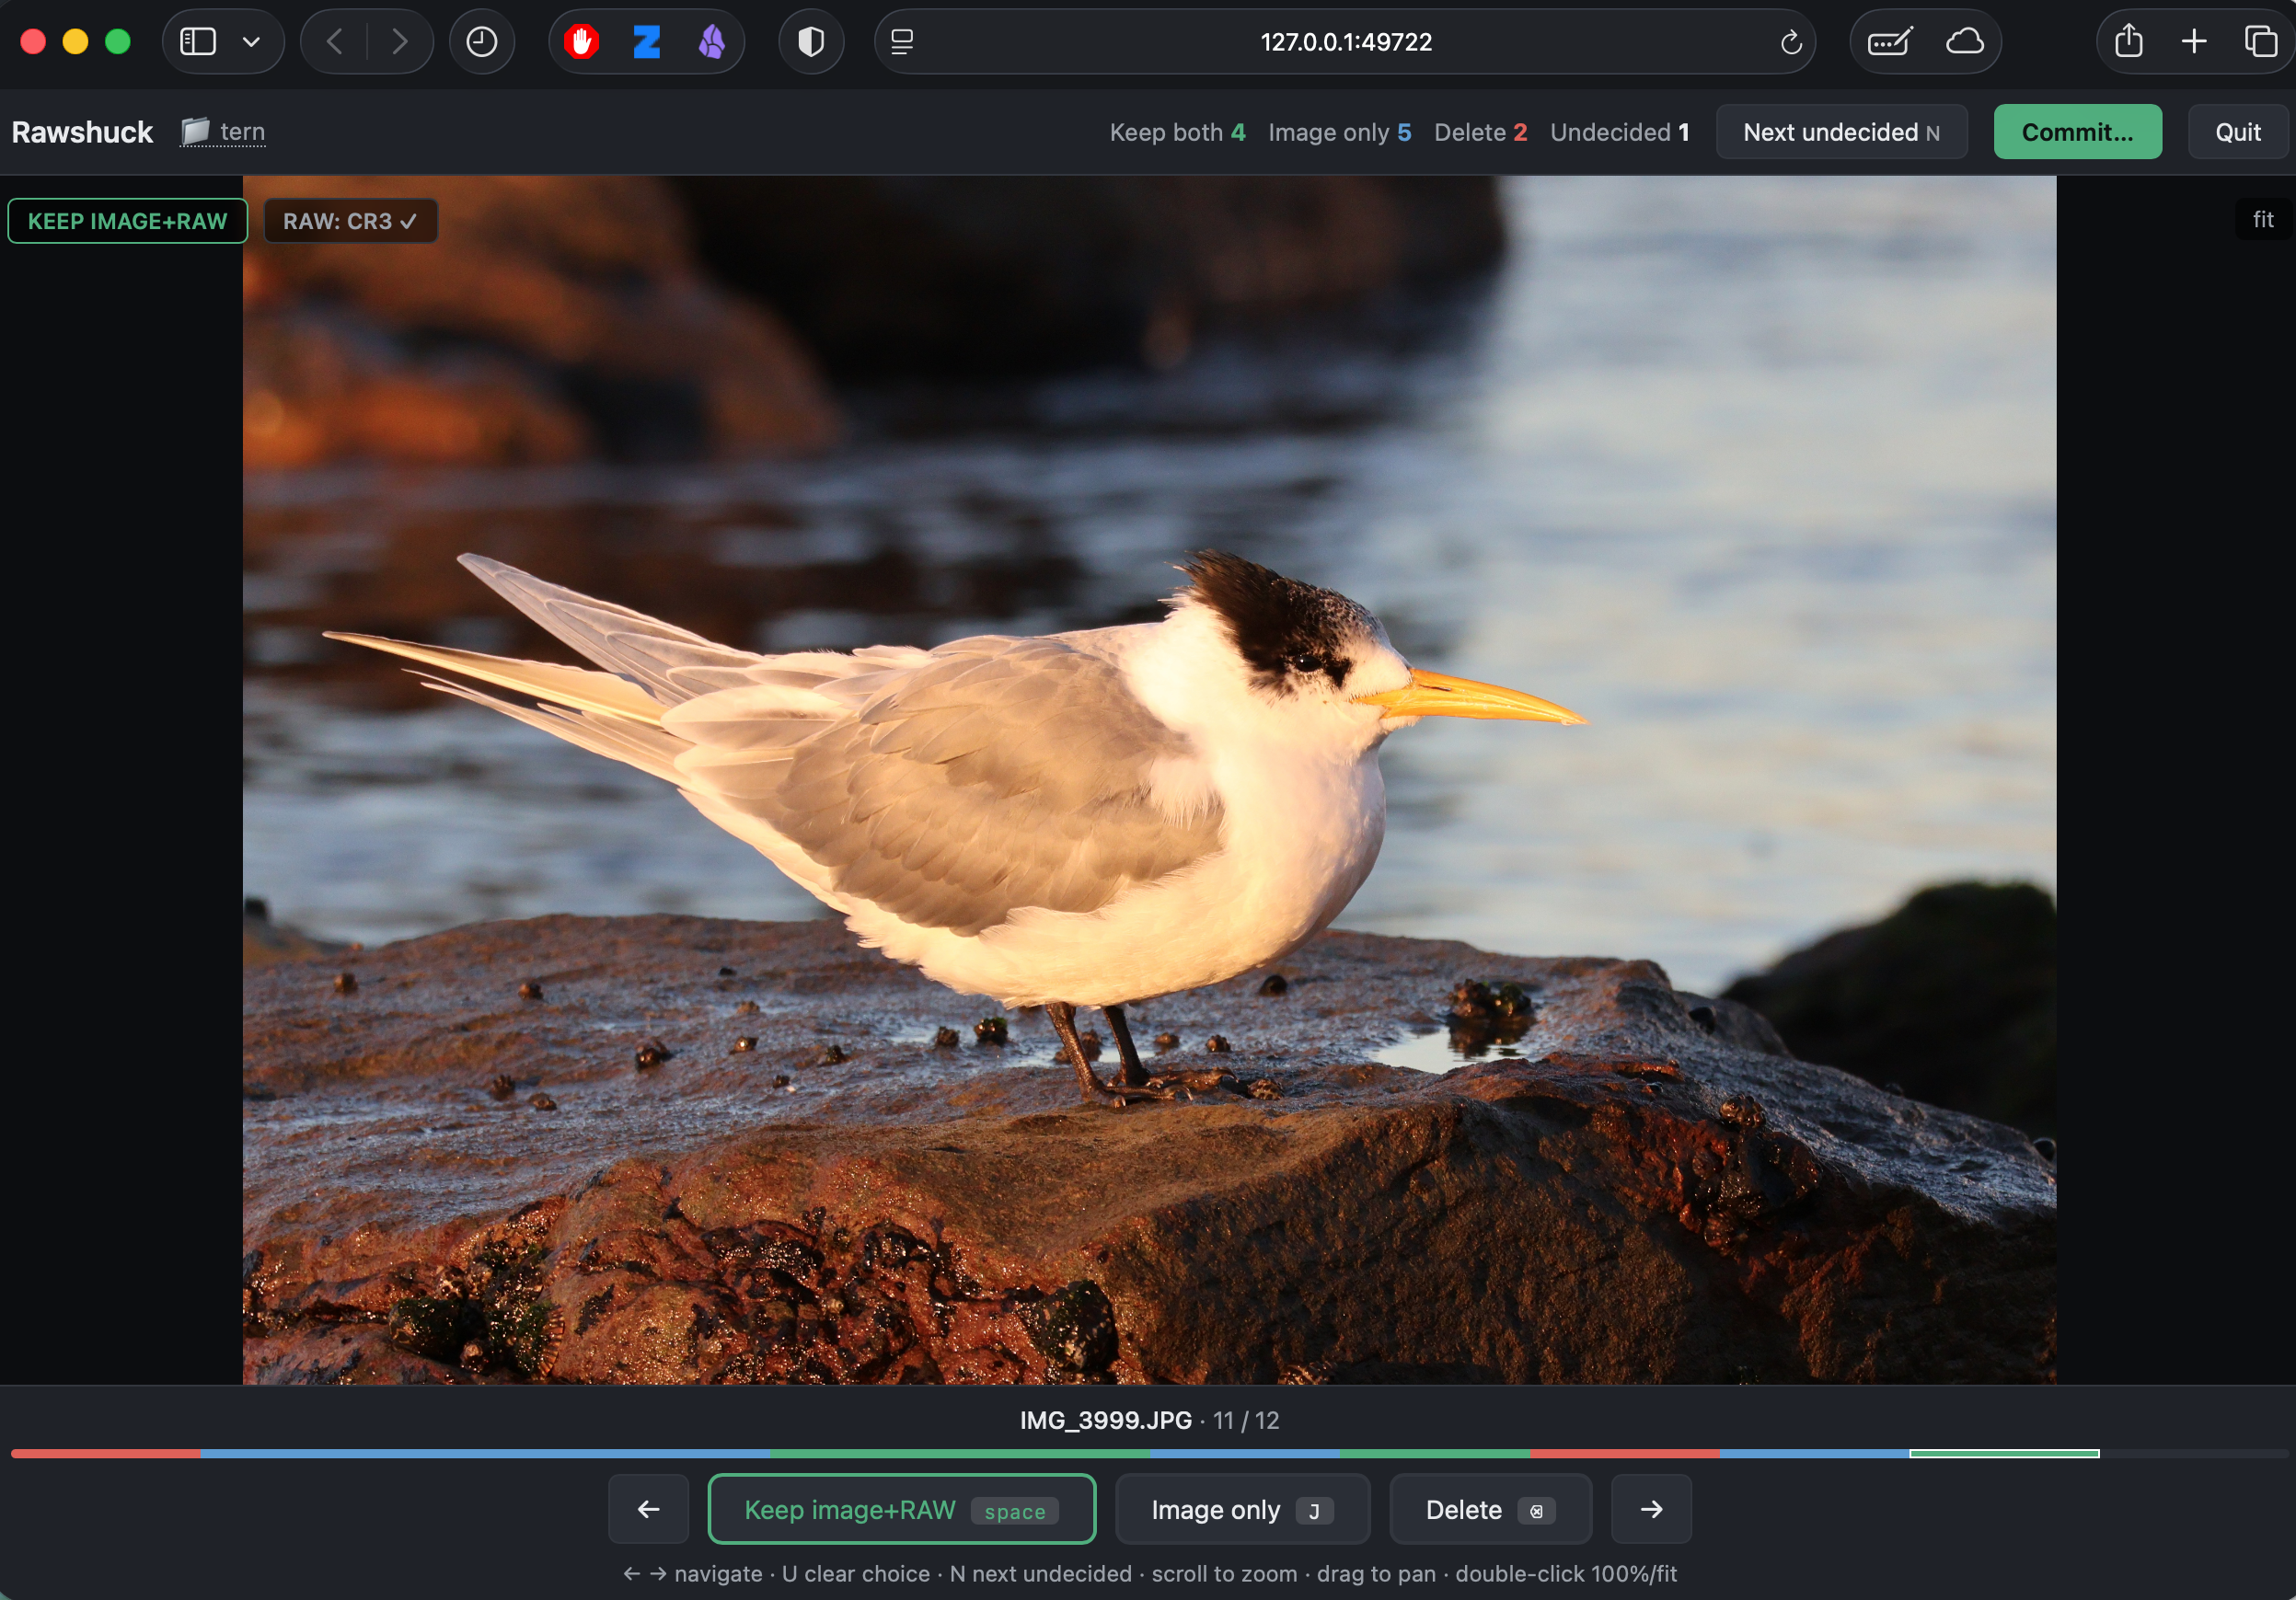
Rawshuck is a free, deliberately narrow tool for culling RAW+JPEG shoots. You point it at a folder of photos. It shows you each photo, one at a time, big and zoomable. You click one of three buttons, or press one of three keys: Space to keep the compressed image+RAW pair, J to keep the compressed image only (J for JPEG), Delete to bin the lot. A coloured progress strip tracks your decisions. When you’re done, you hit Commit, it shows you exactly what’s about to be deleted (and how much disk space you’re clawing back), and then it does the deed. Import the survivors into Photos and you’re done.
That’s it. It doesn’t rate, tag, edit, or organise. It answers one question per photo — what survives? Nothing more.
It comes in two flavours:
- The web version: nothing to install, runs entirely in your browser, nothing is uploaded anywhere (it’s a static page; all file access happens locally). Needs a Chromium browser (Chrome, Edge, Brave, Arc…) because it leans on the File System Access API, which Safari and Firefox don’t support. One caveat: browser deletions are permanent — browsers can’t use the Trash folder.
- The Python version: a single dependency-free script for macOS. Deletions go to the Trash via Finder (recoverable), which makes it the right choice for working through an existing library rather than a fresh SD card. It also previews more formats, courtesy of macOS’s built-in image converter.
Actually using it
A happier use case — sorting a fresh shoot, before anything touches your photo library (this is what I’ll be doing from now on):
- Copy the SD card to a folder (keep the card as backup until you’re done).
- Open rawshuck.pages.dev and drop the folder in (or run
python3 rawshuck.pyand pick the folder). - Sort images quickly with the keyboard shortcuts:
| Key | Action |
|---|---|
Space | Keep image + RAW |
J | Keep image only (RAW gets deleted) |
Delete / Backspace | Delete entirely |
← → | Navigate |
U | Clear choice |
N | Jump to next undecided |
Scroll to zoom, drag to pan, double-click for 100%. Lone RAW files (no JPEG sibling) are reviewable too — the web version even extracts the JPEG preview that Canon embeds inside every CR3, by rummaging through the file’s container structure in the browser. Actually, lone images of many different formats are supported, so you can just use this as a quick and easy keep/delete photo culling tool too, not just the dedicated JPEG+RAW splitting tool I had in mind.
- Hit Commit, admire the spared gigabytes, and import the survivors into Photos in one batch. The one-batch part matters: Photos only links a JPEG and RAW into a pair if they arrive in the same import.
There’s also a back-catalogue workflow for tidying photos already in your library (this is what I’ll be doing for my last two years’ worth of pictures): export unmodified originals from Photos to a folder, cull the folder with Rawshuck, delete the originals from Photos, and reimport the survivors. It’s the same clunky workaround people have identified for a while, but Rawshuck dramatically speeds up the tedious sorting process. This does, however, lead to Wall Two, which I mentioned earlier…
The case of the resurrected RAWs
This was a weird one. It did me a real bamboozle for a while.
I started working through my back catalogue, exactly as described above. Exported a batch of a hundred or so pictures from Photos as unmodified originals. Culled them — RAWs deleted for the non-keepers, a handful of full deletions. Deleted the originals from Photos. Emptied Recently Deleted. Checked my phone, to make sure the deletions had synced: gone. Checked icloud.com: gone. All clear. Reimported the culled files, and watched the import preview confirm exactly what I expected: mostly lone JPEGs, RAW+JPEG badges only on a few keepers I’d selected. Happy days.
A few minutes later, the screen flickered, and suddenly every single reimported photo displayed the RAW+JPEG badge again. Huh?
Was it me? I checked the folder I imported from… mostly JPEGs with a handful of RAWs, as expected. I gaslit myself into thinking I hadn’t deleted things properly and tried again. Same result — within a few minutes, the RAW+JPEG labels were back.
I thought maybe it was a labelling glitch. Maybe something in the JPEG metadata was telling Photos it was part of a RAW+JPEG pair? It was not a labelling glitch. Exporting one of the affected photos produced two files: the JPEG, and the exact CR3 I had deleted from every interface Apple provides on every device, Trash emptied, everything. The RAWs were back from the dead. All of them. How was this possible? Where was it even getting them from??
As it turns out, when you empty Recently Deleted, your photos disappear from every interface you can see — but iCloud retains the underlying data server-side for a window (reportedly around 30 days, ostensibly for data recovery/legal purposes). And iCloud runs some kind of server-side deduplication process on uploads. So when you reimport a JPEG that is byte-identical to the JPEG half of a pair the server still secretly holds, iCloud recognises it, quietly re-links your “new” photo to the old asset — RAW included — and helpfully syncs the whole undead pair back down to all your devices. Spooky.
I did a small A/B test to confirm this. I took two culled JPEGs. Changed a single byte in one (in an invisible metadata field) and left the other untouched as a control. Deleted both from Photos, purge, reimport both. The modified JPEG stayed a JPEG. The identical control resurrected its RAW within minutes. Case closed.
The fix, then, is simple (if a little hacky): make the retained JPEGs not-quite-byte-identical. Rawshuck’s commit step offers to mark each kept JPEG that’s losing its RAW, by appending a tiny tag containing a unique ID to the very end of the file, after all image data. Nothing inside the file moves: the image bitstream is never re-encoded, so the pixels are bit-for-bit identical, EXIF and capture dates are untouched, and the file grows by about fifty bytes. But crucially the checksum changes, so iCloud’s dedupe finds no match and your RAWs stay properly, permanently deleted. The marking is on by default; you can untick it for fresh-off-the-card photos that iCloud has never seen, where there’s nothing to resurrect.
(There’s even a small safety interlock: if a JPEG can’t be marked for some reason, its RAW is deliberately held back from deletion — because an unmarked JPEG plus a deleted RAW is precisely the setup for a silent resurrection later.)
As far as I can tell, this behaviour is undocumented anywhere. If you’ve ever deleted photos, reimported, and had a spooky feeling that your library didn’t get any smaller — it probably didn’t, and maybe this is why.
Addendum
Added 2026-08-04
After putting all this together, I earnestly set about the task of culling my back catalogue. However, I quickly encountered a weird bug. When reimporting back into Photos, a huge chunk of my pictures would briefly appear in the import pane, then disappear in a flash.
After battling through a series of troubleshooting steps and encountering some really bizarre and inconsistent behaviour, I eventually figured it out and patched it. But it was a long strug to get there.
If you like a gnarly and slightly embarrassing software debugging detective story, I’ve written a short addendum post.
If you just care about using the thing, the bug has been patched in the latest release. Please let me know if you encounter any further weirdness via Github Issues.
Links
Rawshuck is free, and lives at rawshuck.pages.dev.
The code (web and Python versions, plus a standalone JPEG-marking utility) is open source (GPL v3) on GitHub. Bug reports welcome — and if you shoot a non-Canon camera, sample RAW files are welcome via GitHub Issues so I can add embedded-preview support for more formats. (There is already some in-built support for non-Canon brand-specific file types but they’re untested.)
If you find it useful and feel like chipping in a few quid toward ongoing development, my Ko-fi page is here.
Once you’ve sorted some nice photos, you might like to extract some beautiful, naturalistic colour palettes from them using my Chromatography web app. Read about Chromatography here.
As for me, I have a photo library that has been accumulating an ungodly number of RAW files for the last two years. If you need me, I’ll be busy sorting their fates. Pray for my J key.